
How to Manage User Feedback?
Collecting and managing user submitted feedback in quantitative means is always a challenge for both the Customer Success team who collects it, and the development team to process it and act upon it. User feedback is very valuable, because unlike internal feedback; your users are all using your product in (sometimes) unpredictable ways. Exploring new use-cases that product managers could perhaps not foresee. Likewise, there is also a high likelihood that parts of your user base have experienced products created by your competitors, hence provide you with feature recommendation or advice on how to improve functionality of your product. Therefore, the feedback you will receive from your users will often be very diverse, less focused, but sometime very innovative. So how can you manage this feedback? In this article I will demonstrate how you can use a Work Management platform to manage feedback.
I will omit discussing feedback collection from users, as this can be achieved through several means. In my previous work experience, we’ve wanted to separate customer feedback away from dev resources or timeline portals. The reason is that feedback needs to be assessed and approved by either a Product Management, CTO or another authority figure. Using a work management platform to store and quantify your user feedback is great starting point for your feedback journey.
Setting up your Feedback Portal.
Create a Feedback table or a place where you can store this feedback. Most SaaS start-up’s will opt to use a work management platform (Monday, Jira, Airtable, etc)… which, have the ability to create relational database tables. The goal of this table is to collect user-feedback but also to process it through a quantitative methodology. To do this, we’ll be splitting the feedback into essentially two categories (it will still be one table)
Category 1: The Basic Information
From your users you will need to provide:
- Title: The name of the feedback (this is often edited by a team-member for better readability)
- Description: A description of the feedback, best to include a visual aid, video, or a link to where it is applicable
- Status: To a bare minimum there should be at least 3 statuses, by default any feedback can have either a blank status, or a ‘unaddressed’ title. A closed status, and a transferable status (this will later be used as a trigger). In my example its called GitHub (as we will later be moving feedback to GitHub).
Category 2: Feedback Assessment
Once basic information on feedback has been recorded the next step is apply quantitative rankings to each feedback. Here is what I mean.
Each feedback should be given a rating from 0-5 on these 3 categories:
- User Value: What is the value of this feedback to the user
- Business Value: What is the value of this feedback to Skippet as a company
- Complexity Rating: Using your best discretion, how complicated will this feedback be to implement
These ratings can be inputted by anyone on the team, but at the same time you can also set permission statuses to enable only certain individuals to assess these 3 rating scores for each feedback item.
Next up, create a column or a value that counts the number of times that a piece of feedback has been requested.
Lastly, using these 4 column values, we can put together a formula that will multiple these values to provide a total score. This total score is quantitative evidence that will help the product team, or management identify what feedback has the highest priority (from a user’s perspective).
The formula construction will differ depending on the tool you are using. But generally speaking, for the Formula Value you will want to generate an average score taking the user value, business value, complexity rating, and create a multiplier based on times requested.
Here is an example of the formula used on Monday.com :
AVERAGE(({User Value}*0.2),({Business Value}*0.4),({Complexity Rating}*0.4))*({Times Requested}*0.5)
Feedback duplicates can be organised as sub-items in the case of Monday, however this will vary depending on your tool.
In this image you can observe the final set up of the table.

Likewise, you can see the table yourselves by pressing on this text!
One final tip, if you do have permissions settings. You can always create notifications to notify individuals with authority when a new feedback item has been added, or once the same type of feedback has been requested x number of times.
Automating and moving your feedback:
You can easily use this table to manage all your feedback, but it is common that the dev team will want to manage feedback via their own platforms. So, it’s best to utilise automations to send Monday cards to their tool of choice. In my experience, the dev team would utilise GitHub issues, requesting that each individual feedback would be an independent issue.
Ideally – this is best managed by a native integration from your work management platform to the dev tool. Yet, limitations can occur when you are dealing with native integrations as the default integrations or automations provided just aren’t powerful for what we want to do.
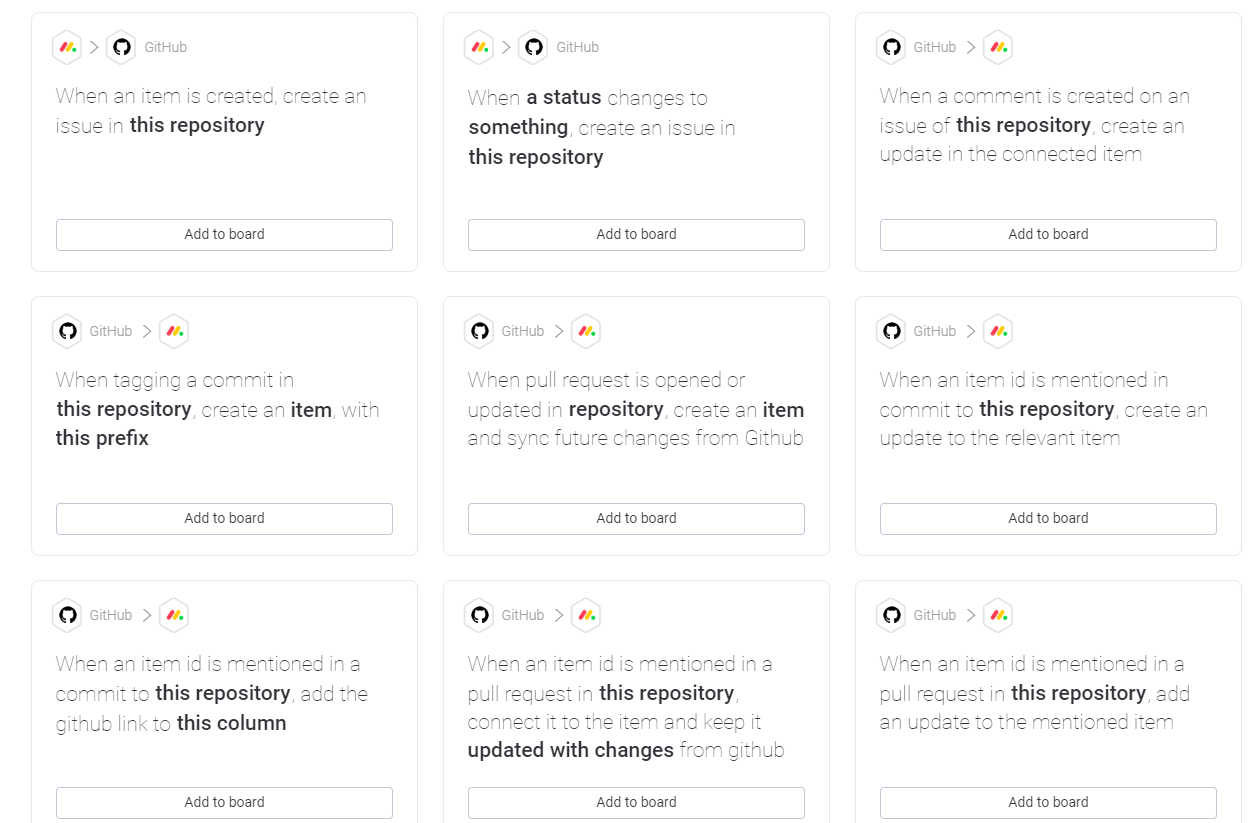
Or, even if the option is present, we simply cannot control what and the amount of information that we want to send to our dev portal.
A workaround is to use a workflow automation tooled such as Zapier. Zapier can help us create web-hooks, making it easy to send information from one platform to another. Better, we can choose and configure what information is sent from Monday to say GitHub.
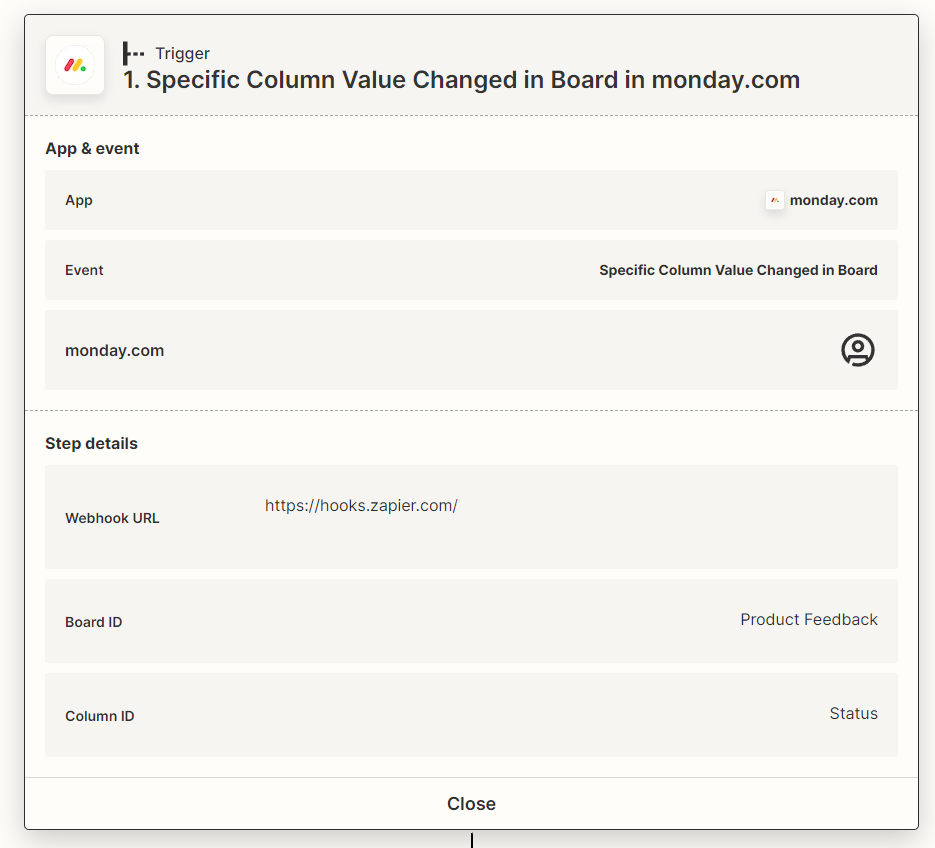
The Trigger we set is the status. If we recall to the image of the data base, we have a status column. The status that we’re looking for is named ‘GitHub’, so when an items status is set to GitHub it will now be automatically sent to the repository of our choice. Its best if we also create permission settings on the actual status column. So, we can control which individuals have the authority to approve user-feedback and send to GitHub or the portal of our choice.

With Zapier we also have a lot of control over what and how we send information. In this screenshot above, you can choose what the trigger will do. In this case, create a new Issue. We can also choose under whose name the Issue will be created. Best of all, you can configure the message, allowing us to send as much details from the Monday Item row to GitHub. In this case we want to send the Item name as the title. In the body of the issue, the item description, the priority, the type of feedback and tags. Of course, you can edit this to your liking. Lastly, in GitHub we’ve also created a new label named ‘User feedback’, so it will be very easy to identify a user submitted feedback issue, over any other type of issue.
Using this methodology of user-feedback we’re able to automate the process to the fullest degree, whilst at the same time respecting the platforms that are preferred by both the Customer Success team and Dev team.